Creating a 1D word game in Unity
In this devlog, I'll give a semi-tutorial description of how I made the visualization system of The Voybit Manuscript. This game was made for the 1-Bit Jam in about five days, and consists of forming and finding words in a one dimensional landscape, decyphering this ubiquitous ancient alien manuscript. As a reference, you can see some of the game's code in the following GitHub repository: https://github.com/ThiagoPace/Public-Voybit.
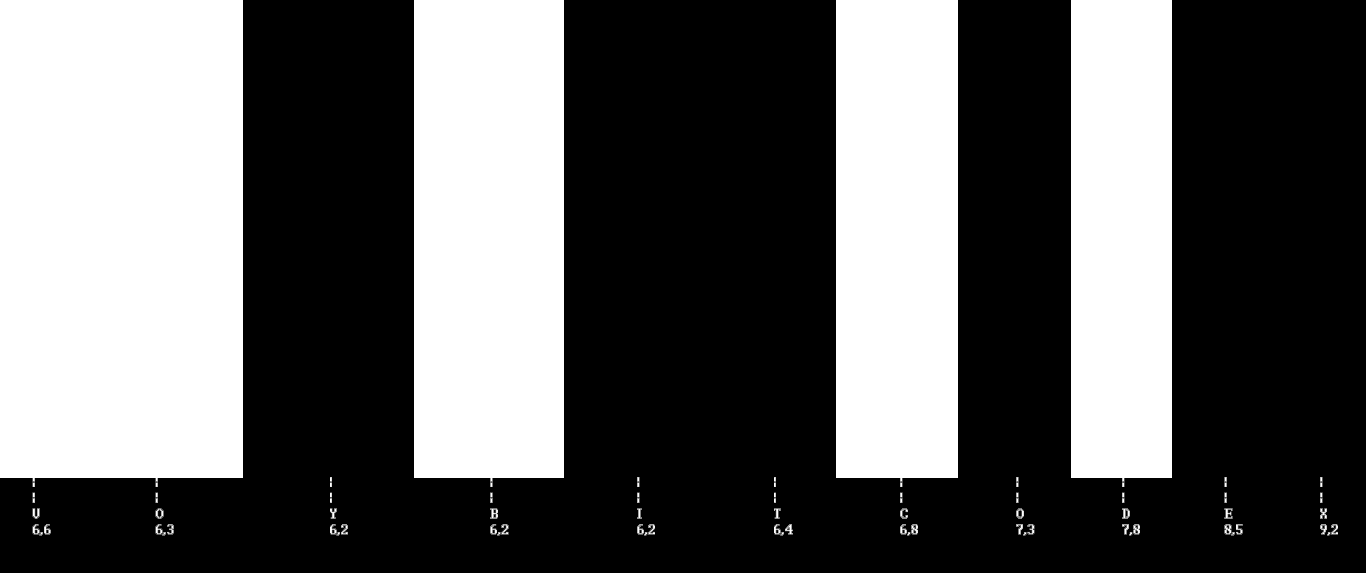
The technique for getting 1D visuals as in the Voybit Manuscript is quite simple. It's basically a 2D ray marching: we cast a bunch of rays from the character, and whenever a ray hits an object of certain color, we'll render a strip with that color. To be more concrete, if we have a total of n rays and the i-th ray cast (0<=i<n) hits an object of color col, then i/n-th to (i+1)/n-th of the screen will have a strip of color col. The images below show the scene and game views:
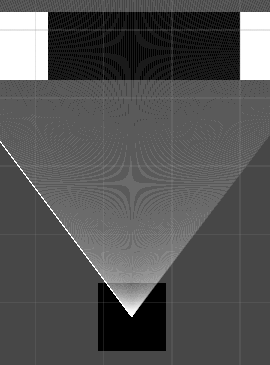
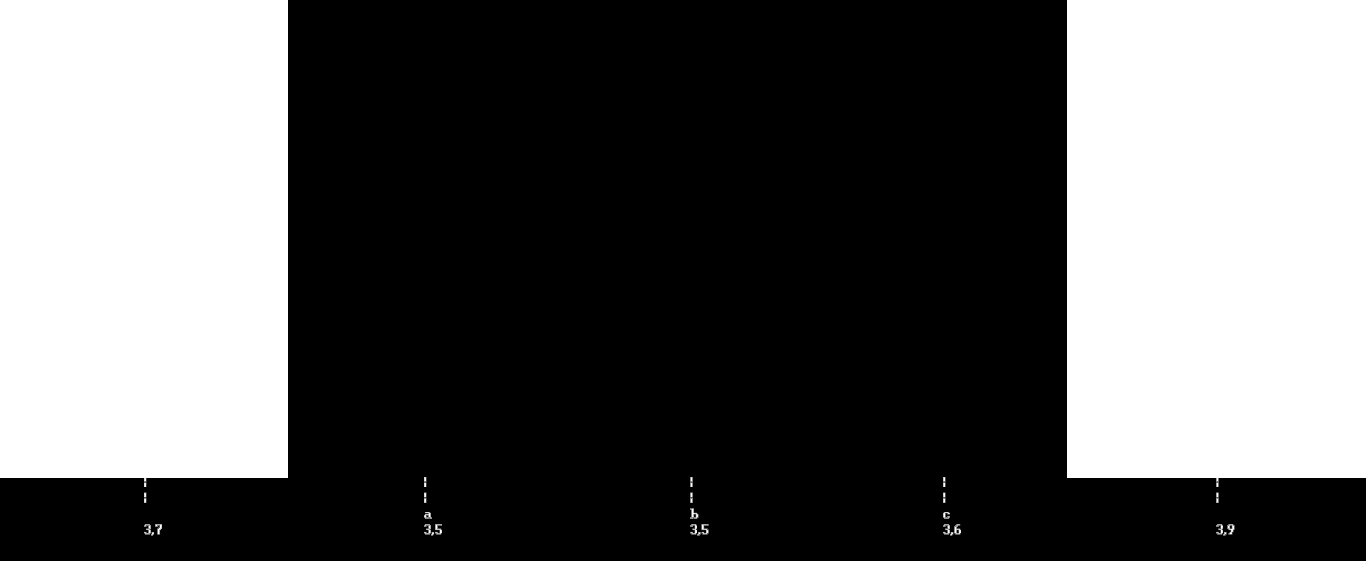
In the specific Unity implementation, this information is then passed to a shader, which actually goes to render the strips on a quad. For convenience, I also used a camera with fixed view on this quad to make a render texture, which is then rendered on a UI image- which is what you end up seeing on the screen.
The Voybit Manuscript game also has some UI that helps 1D navigation- which, otherwise, would be extremely confusing. Most of it, though, is handled right in the editor, so we won't dive too deep on this point.
Let's begin with our scene objects, which I called pillars (the name comes from imagining them as huge 3D pillars). They must keep track of the following information:
- General 1D engine properties:
- Distance to the character: first, we store all the rays from the character vision hitting the pillar. We then use this to get the distance (this may not really be the most efficient way to do it, though);
- Proportions in which the pillar appears in the screen, from 0 (left) to 1 (right). Note that the same pillar may be represented in non-consecutive strips (see below for more). This is useful for the navigation UI (see the SetDisplays method for more):
private Color _color;
public Color Col => _color;
public List<raycasthit2d> hittingRays = new();
private float Distance => hittingRays.Count > 0 ? hittingRays.Min(r => r.distance) : float.MaxValue;

public List<float> stripProportions;
- Specific Voybit Manuscript properties: including the string content of the pillar and if it is active (i.e., black) or not:
public bool active;
public string content;
Ideally, even though the game was made for a 1 week jam where you are allowed to only use two colors, visualization should work with:
- Any amount of colors;
- Level objects of any shape;
- Level objects of any size.
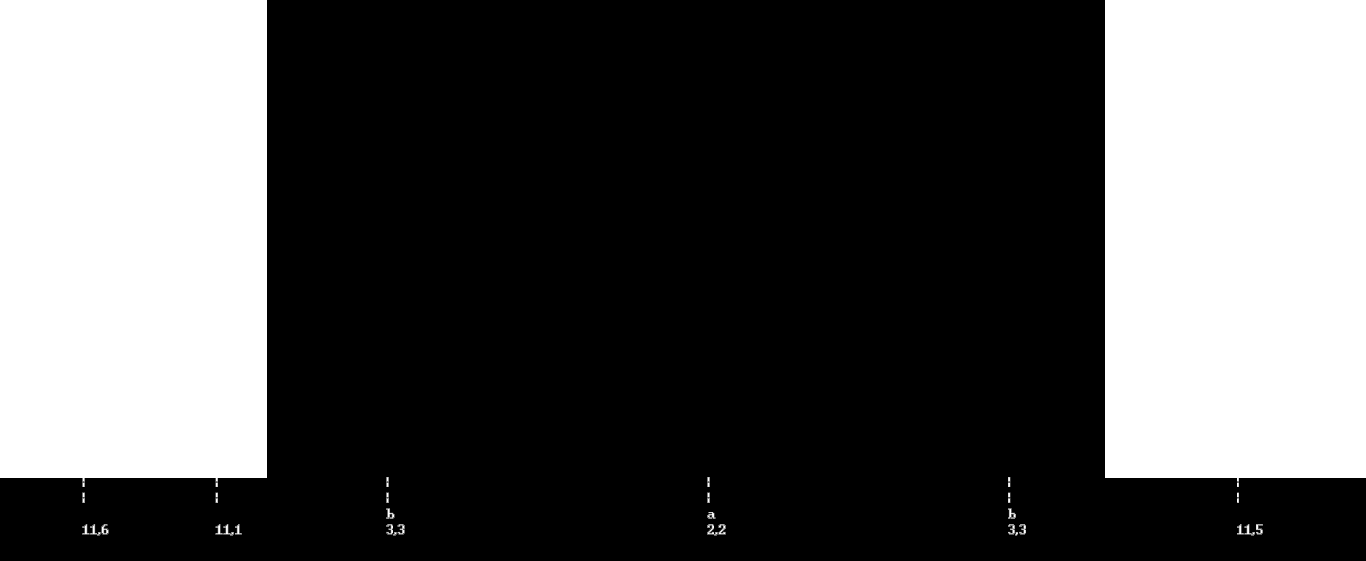
The two first conditions are easy to handle, but the last one is a bit trickier, for the reason that an object may be partially blocked by other pillars, showing in the screen in two non-consecutive strips. This can be seen in the following "T-block" example. One block- say, with the letter "a"- is shown in front of a block of larger width- with the letter "b". The larger one appears twice, blocked in the middle by the smaller one, as shown below.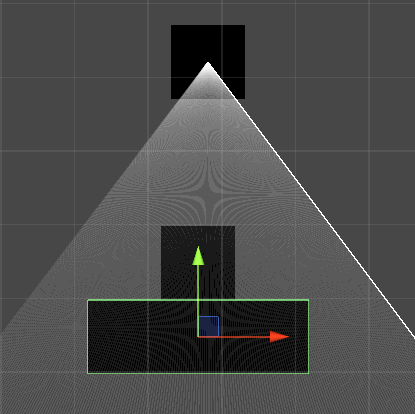
In the implementation, the VisiualHandler class is the main core of the visualization, and is responsible for:
- Finding and handling pillars in the character's vision;
- Passing this information to the shader.
Let's see how the VisiualHandler class handles visualization data. First, we have an array of the strip colors displayed on the screen, from left to right. We also need to know where these colors are shown, so we also have an array to keep track of each strip relative (i.e., to screen widht) delimitation points. In this array, each strip is represented by two consecutive floats between 0 and 1, one to show when it begins and the other when it ends. Both of these have fixed length, and clearly we must have that the delimitations array has double the size of the color array.
//Output properties
private const float MAX_RAYCAST_DIST = 100f;
private const int REL_DEL_SIZE = 100;
private const int COL_SIZE = 50;

private Color[] _colorsArray;

private float[] _relativeDelimitations;
Most of these two arrays won't actually be used all the time, as the only read parts in the shader will be those that actually correspond to pillars in view.
The first step then is, naturally, of doing the ray march and storing neccessary information, done in the GetPillars method. For convenience and performance, the same method is responsible for updating the neccessary data in the pillars in view (both hittingRays and stripProportions).
/// <summary>
/// Gets all pillars in view from left to right. Each pillar takes 1/_rayAmount of the final view.
/// </summary>
private List<pillar> GetPillars()
{
    List<pillar> delimitations = new();
    for (int i = 0; i < _rayAmount; i++)
    {
        Ray2D ray = new Ray2D(_character.Position, GetRayDir(i));
        RaycastHit2D hit = Physics2D.Raycast(ray.origin, ray.direction, MAX_RAYCAST_DIST, ~_character.characterLayer);
        if (hit.collider)
        {
            Pillar hitPillar = hit.collider.GetComponent<pillar>();
            if (hitPillar)
            {
                if (!delimitations.Contains(hitPillar))
                {
                    hitPillar.ResetProportions();
                }
                delimitations.Add(hitPillar);
                hitPillar.hittingRays.Add(hit);
            }
        }
    }
    SetPillarsProportions(delimitations);
    return delimitations;
}
private Vector2 GetRayDir(int i)
{
    float rightPos = i / (_rayAmount - 1f);
    float rightAmount = _visionAmplitude * (rightPos - 0.5f);
    return _character.Forward + _character.Right * rightAmount;
}
The GetPillars method then gets used by some "derived methods", like GetPillarColors, GetNonConsecPillars and GetDistinctPillars (and the Voybit-exclusive GetActiveIslands as well).
Finally, it's straightforward to pass scene data to the shader:
public void SetShader()
{
    SetRelativeDelimitations();
    _stripeMat.SetFloatArray("_RelativeDels", _relativeDelimitations);
    _stripeMat.SetInt("_RelDelsLength", _relativeDelimitations.Length);
    _stripeMat.SetColorArray("_StripColors", _colorsArray);
}
private void SetRelativeDelimitations()
{
    List<color> cols = GetPillarColors();
    int colCount = cols.Count;
    List<float> relDelims = new() { 0f };
    List<color> colDelims = new() { cols[0] };

    Color currentColor = cols[0];
    for (int i = 0; i < colCount; i++)
    {
        if (cols[i] != currentColor)
        {
            relDelims.Add((float)i / _rayAmount);
            relDelims.Add((float)i / _rayAmount);
            colDelims.Add(cols[i]);
        }
        currentColor = cols[i];
    }
    relDelims.Add(1f);
    SetRelDelims(relDelims);
    SetColDelims(colDelims);
}
The job of the shader is then very simple, and the code speaks by itself (for those new to Unity shader coding, this may help): we just set the color depending on the UV horizontal coordinate, consulting the arrays just passed by VisualHandler.
float _RelativeDels[100];
int _RelDelsLength;
fixed4 _StripColors[50];
fixed4 frag(v2f i) : SV_Target
{
    //For debugging
    fixed4 col = fixed4(1,0,0,1);
    for (uint j = 0; j < _RelDelsLength; j += 2)
    {
        //Check if it uv coordinates are in the strip region
        if (_RelativeDels[j] <= i.uv.x && _RelativeDels[j + 1] > i.uv.x)
        {
            col = _StripColors[j/2];
            break;
        }
    }
    return col;
}
Now, when are these functions actually called? Well, we could just call them under Update every frame, and the perfomance cost is actually quite low. Still, I opted to make an interface called IVisualSender, whose members all have an event responsible for- when invoked- calling the methods responsible for visualization update. In Awake, VisualHandler finds all components which are members of this interface, and them listens to their updating events. As an example, our Character2D class is one of them: whenever the character moves, the event is fired and visuals are updated.
Of course, there's some more to the Voybit Manuscript, as prompt messages and commands are a very important part of the gameplay. Still, I think most will be more interested in the 1D part of it. As a post-jam reflection, I think this game has some really interesting ideas and mechanics, and I might give it an update on the future. Hope you like it as well!
Leave a comment
Log in with itch.io to leave a comment.